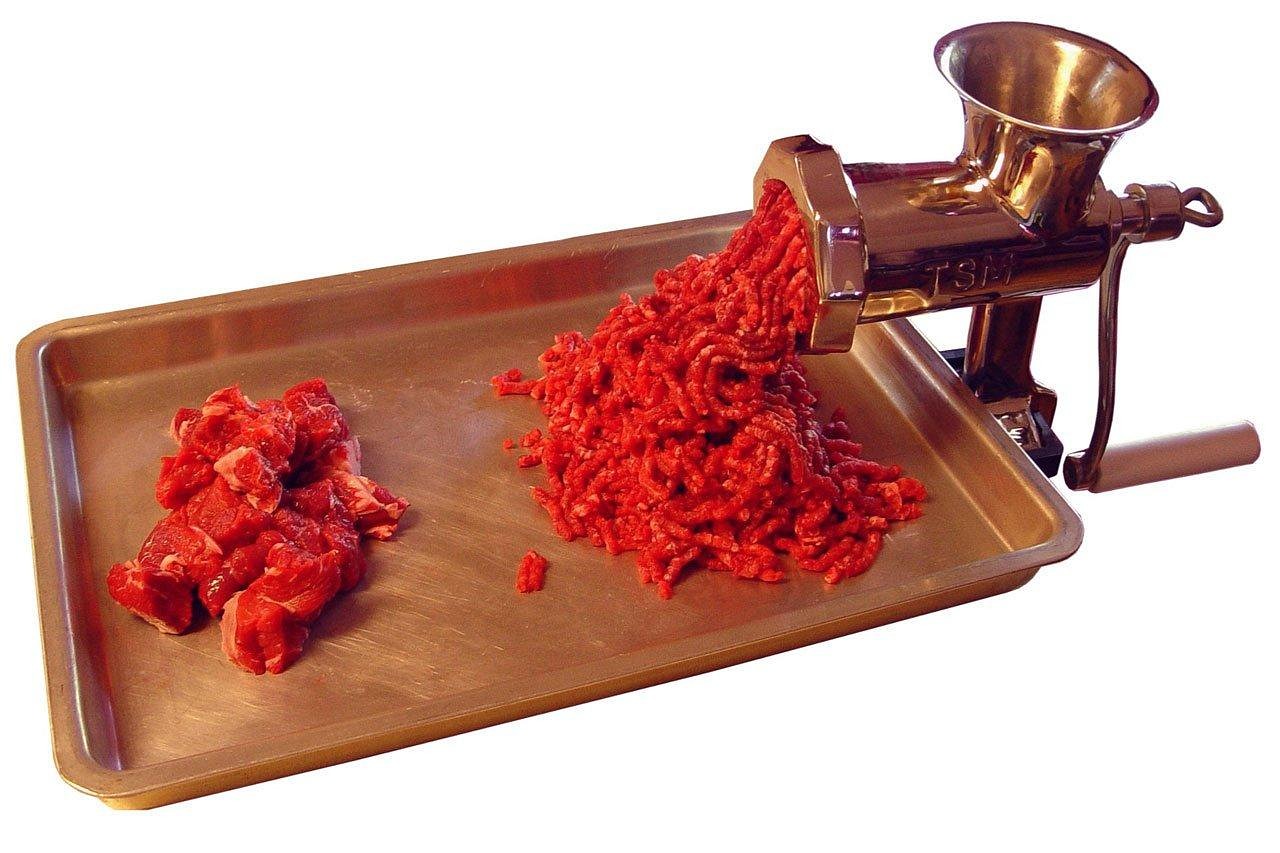
Understanding Why Your Meat Grinder Clogs: A Technical Breakdown
Clogging is the most common operational failure encountered when processing meat. It occurs when the meat material, instead of being cleanly sheared and extruded through the die plate, accumulates around the auger (worm) and knife assembly, causing excessive friction and stalling the motor. Resolving and preventing this issue requires a systematic understanding of the mechanical and material factors at play.
Primary Causes of Meat Grinder Clogging (The Four Pillars of Failure)
Effective meat grinding relies on a precise balance of temperature, component sharpness, and operational technique. When this balance is disrupted, the result is often a frustrating clog. We categorize the root causes into four critical areas.
1. Improper Meat Preparation and Temperature Control
Meat consistency is the single most important factor influencing smooth operation. The presence of soft, warm, or overly fibrous material drastically reduces the efficiency of the cutting mechanism.
The Critical Role of Temperature
Meat must be chilled to near-freezing temperatures—ideally between 28°F and 32°F (-2°C to 0°C)—before grinding. When meat is warm, the fat content softens and becomes viscous. This soft fat smears rather than cuts, coating the internal components and creating drag. The resulting friction generates heat, which further softens the meat, creating a vicious cycle of smearing and clogging.
Sinew, Silver Skin, and Connective Tissue
Connective tissues, such as silver skin, tendons, and gristle, are highly elastic and resistant to the shear forces exerted by the knife and plate. Unlike muscle fiber, which cuts cleanly, these tissues wrap around the auger and the center pin of the grinding plate. This accumulation acts like a net, trapping subsequent meat fibers and rapidly building up a blockage that prevents extrusion.
2. Dull or Damaged Grinding Components
The grinding mechanism relies on the precise, flush contact between the rotating grinder knife and the stationary die plate (or grinding plate). This relationship creates the necessary shear force to cut the meat.
The Knife-Plate Relationship
If the knife blade is dull, or if the plate surface is pitted or uneven, the gap between the two components increases. Instead of a clean cut, the meat is mashed and forced through the holes. This mashing action requires significantly more motor power and results in a paste-like product that struggles to exit the plate, leading to immediate backup and clogging. Regular inspection of your stainless steel meat grinder guide components is essential.
Incorrect Plate Selection
Attempting to use a very fine plate (e.g., 3mm) for the initial grind of tough, unprepared meat will almost certainly cause a clog. The smaller holes offer higher resistance, requiring more force to push the material through. Always start with a coarse plate (e.g., 10mm or 12mm) for the first pass, especially when processing large volumes or tougher cuts.
3. Incorrect Assembly and Operational Technique
Even with perfectly prepared meat and sharp components, improper setup can lead to immediate failure.
Locking Ring Tension
The locking ring (or collar) secures the die plate and provides the necessary pressure to keep the knife flush against the plate. If the ring is too loose, the knife separates from the plate, resulting in smearing. If it is overtightened, it creates excessive friction, straining the motor and generating heat, which causes the meat to warm up and clog.
Overfeeding the Grinder
Meat grinders are designed to process material at a steady, manageable rate. Pushing too much meat into the feed tube too quickly overwhelms the auger and the motor. The meat cannot be processed fast enough to clear the plate, leading to a bottleneck and subsequent stall. Always feed the meat in manageable strips or cubes, allowing the auger to pull the material through naturally.
4. Mechanical and Maintenance Issues
Long-term maintenance failures can manifest as sudden clogging.
- Worn Auger Bushings: In older or heavily used grinders, the bushings or bearings supporting the auger shaft can wear down, causing misalignment. This misalignment prevents the knife from sitting perfectly flush against the plate, compromising the cutting action.
- Insufficient Lubrication: While meat grinding components should be cleaned thoroughly after every use, they must be properly dried and lightly lubricated (using food-grade mineral oil) before storage. Rust or corrosion on the auger or housing increases surface friction, slowing the process and contributing to clogs.
- Motor Strain: If the motor is undersized for the task (common in budget or older models), it may lack the torque necessary to push through even minor resistance, leading to frequent stalls that mimic a clog. When considering an upgrade, review a best meat grinder home buying guide.
Step-by-Step Troubleshooting: How to Fix a Clogged Meat Grinder
When your grinder stalls, immediate action is required to prevent motor damage and ensure food safety.
Immediate Action: Reversing and Clearing the Blockage
- Power Down Immediately: Turn off and unplug the machine. Continued operation against a clog can burn out the motor.
- Use the Reverse Function (If Available): Many electric grinders have a reverse setting. Run the machine in reverse for 5-10 seconds. This often pulls the accumulated material back out of the grinding head, relieving pressure.
- Disassembly and Inspection: If reversing fails, or if you are using a manual grinder, fully disassemble the grinding head. Unscrew the locking ring, remove the die plate, the knife, and the auger.
- Clear the Obstruction: Manually remove the mass of sinew and meat wrapped around the auger and the knife. Use a stiff brush or a small tool to clear the holes of the die plate.
- Identify the Root Cause: Before reassembly, inspect the components. Is the knife dull? Is the meat still frozen? Address the cause before resuming grinding.
Deep Cleaning and Component Inspection
After clearing a major clog, a full inspection is mandatory. Use a guide on used meat grinder guide inspection to ensure all parts are functional.
- Check the Knife Edge: Run a finger lightly along the cutting edge. It should feel sharp and uniform. If it feels rounded or nicked, it needs sharpening or replacement.
- Inspect the Plate Holes: Ensure all holes are clear and that the plate surface is flat. If the plate is warped or heavily scratched, it must be replaced to maintain the necessary shear force.
- Clean the Auger and Housing: Use hot, soapy water and a bottle brush to remove all fat and residue from the auger spirals and the internal housing. Ensure all parts are completely dry before reassembly or storage.
Advanced Prevention Strategies for Professional Results
Preventing clogs is far more efficient than fixing them. Implementing strict preparation protocols ensures smooth, high-volume grinding.
Optimal Meat Preparation Protocols (The 30-Minute Chill)
- Pre-Cut and Cube: Cut the meat into strips or cubes that are small enough to fit easily into the feed tube without forcing. This reduces the initial load on the auger.
- Remove All Connective Tissue: This is the most crucial step. Use a sharp boning knife to meticulously trim away all visible silver skin, tendons, and gristle. These tissues are the primary culprits in severe clogs.
- The Deep Freeze: Place the cubed, trimmed meat on a metal baking sheet and place it in the freezer for 30 to 45 minutes. The goal is for the meat to be firm to the touch, with the edges starting to freeze, but the center still slightly pliable. This firmness ensures the fat is solid and the muscle fibers fracture cleanly under the knife.
- Chill Equipment: Place the grinding head, auger, knife, and plate in the freezer alongside the meat. Cold components maintain the low temperature of the meat, preventing premature fat softening.
Maintaining Component Sharpness
For high-volume users, the knife and plate should be professionally sharpened or replaced annually. For home users, sharpening can be done using a fine-grit whetstone or specialized sharpening kits, ensuring the cutting surface remains perfectly flat and flush.
The Double Grind Technique
If you require a fine grind (e.g., for emulsified sausages), never attempt it in a single pass. Use the double grind technique:
- First Pass (Coarse): Use a large die plate (8mm or 10mm) to break down the large chunks and tough fibers.
- Second Pass (Fine): Chill the coarsely ground meat again until it is very cold (about 15 minutes). Then, run it through the desired fine plate (3mm or 4.5mm). The pre-ground material flows much more easily through the fine plate, drastically reducing the risk of clogging.
Frequently Asked Questions (FAQ)
Q: Can I grind partially thawed meat?
A: No. Partially thawed meat is inconsistent. The outer layer will be soft and warm, leading to smearing and clogging, while the inner core may still be frozen solid, creating uneven resistance. All meat should be uniformly chilled to 32°F (0°C) or slightly below.
Q: Why does my grinder clog when I use the sausage stuffing attachment?
A: Clogging during stuffing is usually caused by two factors: the meat mixture is too cold and stiff, or the stuffing tube is too narrow for the consistency of the meat. Ensure the meat is slightly warmer (around 35°F) for better flow, and use the largest stuffing tube possible for the casing size.
Q: Is it safe to put bones through a meat grinder?
A: Only if you have a commercial-grade or specialized bone grinder. Standard home meat grinders are not designed to handle hard bone material. Attempting to grind bones will immediately clog the machine, dull the knife and plate, and potentially damage the motor or gears. Always consult your grinder’s manual regarding bone processing capabilities.
Q: How often should I lubricate my grinder components?
A: Components should be lightly coated with food-grade mineral oil after every cleaning and drying cycle, especially before long-term storage. This prevents rust and ensures smooth operation upon the next use. The oil reduces the initial friction when the machine starts up.
Q: What is the maximum amount of fat I can grind without clogging?
A: While high-fat content (up to 30-40%) is common for certain sausages, the key is the temperature of the fat, not the volume. If the fat is rock-hard and cold, it will cut cleanly. If the fat is soft and pliable, it will smear and clog, regardless of the percentage.
Master Your Grinding Process
Achieving perfect ground meat consistently is a matter of discipline and preparation, not brute force. By adhering to strict temperature controls, meticulously trimming connective tissue, and maintaining the sharp, flush relationship between the knife and the die plate, you can virtually eliminate frustrating clogs. Invest in quality components and follow the recommended maintenance schedule to ensure your equipment delivers professional-grade results every time.
References
- American Meat Science Association. Best Practices for Ground Meat Production: Temperature and Texture Control. 2025. https://www.meatsandsausages.com/ “Meat Grinding Best Practices and Temperature Control” — This resource details the thermodynamic principles required to maintain optimal meat viscosity during the grinding process, emphasizing the 28°F to 32°F range.
- Food Processing Technology Review. Mechanical Efficiency in Food Grinders: The Role of Shear Force and Component Alignment. 2025. “Mechanical Efficiency in Food Grinders” — A technical analysis explaining how the gap tolerance between the rotating knife and stationary plate directly impacts shear force and prevents material smearing and subsequent motor strain.
- National Sanitation Foundation (NSF). Guidelines for Commercial Food Equipment Maintenance and Lubrication. 2025. “NSF Guidelines for Commercial Food Equipment Maintenance” — Provides standards for the cleaning, drying, and food-grade lubrication of processing equipment to prevent corrosion and maintain operational hygiene and efficiency.
Last Updated on October 14, 2025 by Robert Vance