The Essential Guide to the KitchenAid Meat Grinder Attachment
The KitchenAid stand mixer is a cornerstone of many modern kitchens, known for its versatility far beyond baking. One of its most popular and functional accessories is the meat grinder attachment. This tool transforms the powerful planetary action of the stand mixer into a robust food processing machine, allowing home cooks to control the quality, texture, and flavor of their ground meats, vegetables, and other ingredients.
Since its introduction, the KitchenAid meat grinder attachment has evolved, offering users both classic plastic models and newer, more durable metal constructions. Understanding the nuances of these attachments—from proper assembly and operation speed to essential cleaning protocols—is key to maximizing their performance and ensuring food safety in your home kitchen.
This comprehensive guide provides detailed instructions, maintenance tips, and expert techniques for utilizing your KitchenAid meat grinder attachment effectively in 2025.
Understanding the KitchenAid Meat Grinder Entity
The KitchenAid meat grinder system is designed to leverage the motor of the stand mixer, making it a space-saving and powerful alternative to dedicated electric grinders. However, not all attachments are created equal, and compatibility is crucial.
Comparing the Classic (FGA) vs. Premium Metal (KSMMGA) Attachments
KitchenAid currently offers two primary types of meat grinding attachments, each serving slightly different user needs and budgets:
| Feature | Classic Food Grinder (FGA) | Premium Metal Food Grinder (KSMMGA) |
|---|---|---|
| Construction Material | Durable plastic housing | Cast aluminum/stainless steel |
| Durability | Good for occasional use | Excellent; designed for heavy, frequent use |
| Temperature Control | Requires diligent chilling | Metal housing helps maintain cold temperature |
| Cleaning | Dishwasher safe (some parts) | Hand wash recommended |
| Included Accessories | Basic grinding plates, food pusher | Multiple grinding plates, two sausage stuffers, cleaning brush |
The metal attachment (KSMMGA) is generally preferred by serious home processors because its metal construction helps keep the meat colder during the grinding process, a critical factor in preventing bacterial growth and ensuring superior texture. For those interested in dedicated, heavy-duty equipment, comparing the performance against specialized units, such as those discussed in our stainless steel meat grinder guide, can be insightful.
Compatibility with KitchenAid Stand Mixers
All current KitchenAid meat grinder attachments are designed to fit the standard power hub found on all KitchenAid stand mixer models, regardless of whether the mixer is a tilt-head or bowl-lift design. This universal fit ensures that whether you own a Classic, Artisan, Professional, or Commercial series mixer, the attachment will connect securely.
It is important to ensure the attachment is properly secured using the hub screw. A loose connection can lead to instability and potential damage to the attachment or the mixer hub during operation.
Step-by-Step Instructions for Assembly and Operation
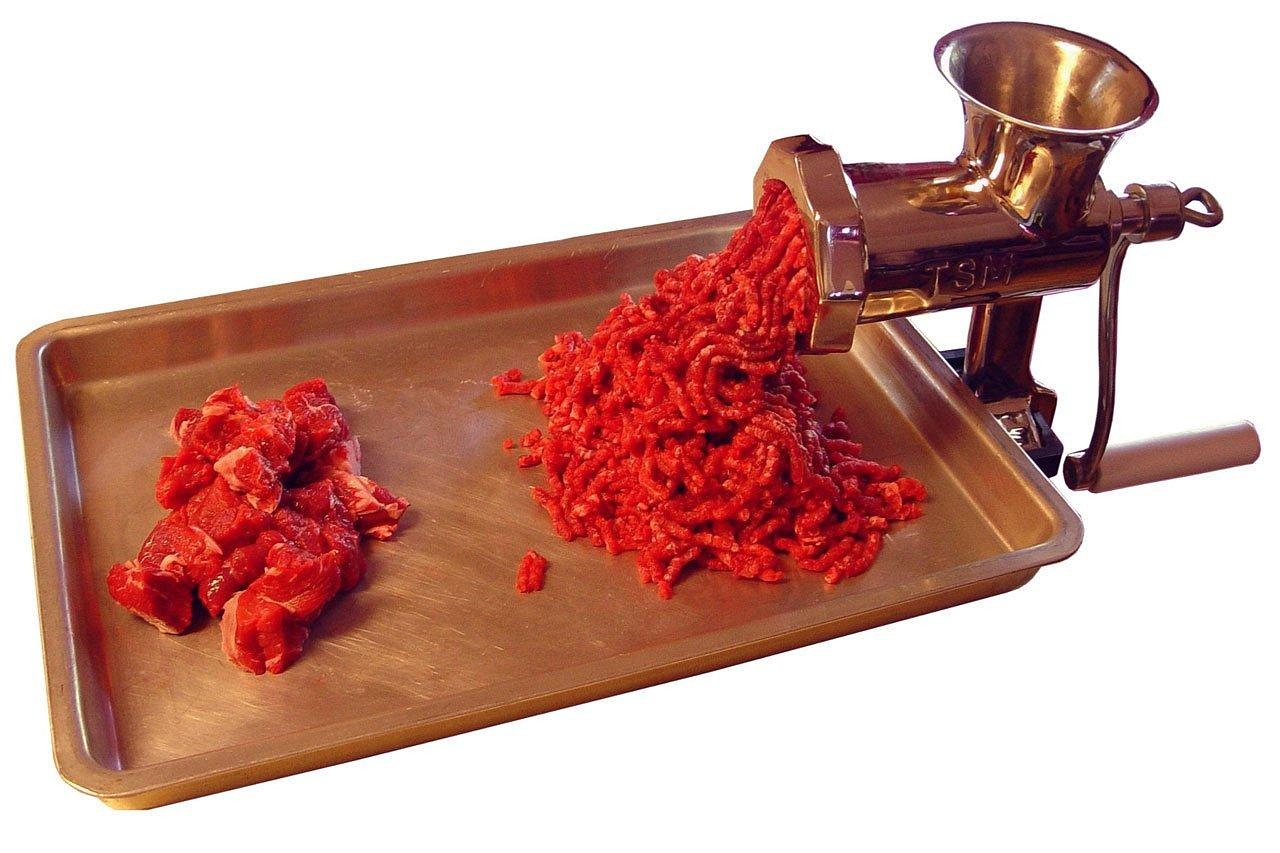
Mastering the kitchenaid meat grinder instructions ensures efficiency and safety. The process is straightforward but requires attention to detail, particularly regarding temperature control.
Pre-Grinding Preparation (Meat Chilling and Safety)
Temperature is the single most important factor in successful meat grinding. Warm meat smears rather than cuts, leading to poor texture and increasing the risk of spoilage.
- Chill the Meat: Cut the meat (e.g., beef, pork, poultry) into 1-inch cubes. Place the cubes on a baking sheet and freeze for 30 to 45 minutes until the edges are firm but the center is still pliable. The ideal internal temperature for grinding is between 30°F and 34°F (-1°C to 1°C).
- Chill the Equipment: Place the meat grinder attachment—including the housing, auger, blade, and selected plate—in the freezer for at least 30 minutes prior to assembly. This is especially crucial for the plastic FGA model, but highly beneficial for the metal KSMMGA model as well.
- Ensure Safety: Always review Meat Grinder Safety Protocols before starting any grinding operation. Never use your fingers to push meat into the hopper; always use the provided food pusher.
Assembly Guide
Follow these kitchenaid meat grinder attachment instructions for secure setup:
- Attach the Auger: Insert the metal auger (worm gear) into the grinder housing, ensuring the square end aligns with the housing slot.
- Install the Blade: Place the cutting blade onto the auger shaft. Crucially, the sharp, flat side of the blade must face outward, against the grinding plate. If installed backward, the meat will be crushed, not cut.
- Secure the Plate: Select your desired grinding plate (coarse, medium, or fine) and place it over the blade and auger shaft.
- Tighten the Ring: Screw the locking ring onto the housing until it is hand-tight. Do not overtighten, as this can cause friction and heat buildup.
- Mount to Mixer: Insert the assembled grinder into the mixer’s power hub. Ensure the hub screw is tightened securely to prevent the attachment from rotating during use. Place a large, chilled bowl beneath the output to catch the ground meat.
Optimal Grinding Speed and Technique
Determining the correct kitchenaid meat grinder speed is vital for efficient operation and motor longevity. KitchenAid recommends specific speeds for grinding and stuffing:
- Grinding: Use Speed 4 (Medium). This speed provides enough torque to process the meat quickly without overheating the mixer motor or the meat itself. If the meat is properly chilled, Speed 4 should handle most tasks smoothly.
- Sausage Stuffing: Use Speed 2 (Low). Stuffing requires a slower, more controlled pace to ensure the casing fills evenly without bursting. Using a low speed also prevents air pockets from forming in the sausage.
Feed the chilled meat cubes into the hopper at a consistent, moderate pace. Avoid forcing large amounts of meat through the grinder, as this can strain the motor and cause the meat to jam or warm up too quickly.
Deep Dive into KitchenAid Meat Grinder Parts and Accessories
Understanding the components of your grinder is essential for maintenance and achieving specific culinary results. If you are looking to replace or restore older components, guides on restoring universal meat grinder parts can offer valuable insights.
Grinding Plates: Fine, Medium, and Coarse
The grinding plate determines the final texture of your product. Most kitchenaid meat grinder parts list include three standard plates:
- Coarse Plate (6mm or larger): Ideal for chili, coarse sausages (like bratwurst), and first-pass grinding (when double grinding).
- Medium Plate (4.5mm): The versatile standard, perfect for general ground beef, meatloaf, and many types of fresh sausage.
- Fine Plate (3mm): Used for pâtés, spreads, baby food, and very finely textured sausages like hot dogs or bologna. Note that fine grinding generates more friction and requires the meat to be extremely cold.
The Importance of the Food Pusher and Hopper
The hopper is the tray that holds the meat before it enters the housing. The food pusher is a non-negotiable safety tool. It is designed to fit the throat of the grinder perfectly, pushing the meat down to the auger without allowing fingers near the moving parts. Never substitute the official food pusher with utensils or your hands.
Sausage Stuffing Kit Integration
Many KitchenAid attachments come with a sausage stuffing kit, which typically includes two sizes of stuffing tubes (small for breakfast links, large for Italian or Polish sausage). This accessory replaces the grinding plate and blade after the meat has been ground.
To use the stuffer, the ground meat is fed back into the hopper. The auger pushes the meat through the tube and into the casing. This process is covered in detail in guides dedicated to Sausage Making.
Maintenance and Longevity: Care for Your KitchenAid Grinder
Proper cleaning is critical for hygiene and preventing corrosion, especially with the metal attachments. Meat residue left in the housing or on the blade can harbor bacteria and ruin the next batch of food.
Disassembly and Cleaning Protocols
- Immediate Cleaning: Disassemble the grinder immediately after use. Do not let meat residue dry and harden inside the unit.
- Initial Rinse: Rinse all parts under warm water to remove large pieces of meat. Use a stiff brush or the provided cleaning brush to clear the holes in the grinding plates.
- Washing: For the metal KSMMGA attachment, hand washing is strongly recommended using hot, soapy water. While some plastic parts of the FGA are top-rack dishwasher safe, hand washing ensures the longevity of the sharp blade and plates.
- Drying: This is the most crucial step for metal components. Thoroughly dry all metal parts immediately after washing. Even stainless steel can rust if left wet, particularly the high-carbon steel blade and plates. Use a towel, and consider a final air-dry before storage.
Storage and Rust Prevention
Store the dried metal parts in a dry environment. Some users lightly coat the blade and plates with a food-grade mineral oil before storage to create a protective barrier against moisture. Store the small parts, like the plates and blade, in a small, sealed container to prevent loss.
Advanced Grinding Techniques for Superior Results
While the KitchenAid grinder is often used for simple beef grinding, it excels in more complex applications, provided the user employs the right techniques.
Double Grinding for Fine Textures
For recipes requiring a very fine texture, such as delicate terrines or certain types of emulsified sausages, double grinding is necessary. This involves running the meat through the grinder twice.
- First Pass: Use the coarse plate (6mm) to break down the large chunks of meat.
- Second Pass: Chill the coarsely ground meat again for 15–20 minutes. Then, run it through the fine plate (3mm).
Double grinding ensures a uniform, smooth texture and helps thoroughly mix in any added fat or seasoning.
Grinding Non-Meat Items (Vegetables, Cheese, Bread)
The KitchenAid grinder is highly versatile. It can be used to process a variety of non-meat ingredients:
- Hard Cheeses: Grinding hard cheeses like Parmesan or Romano works well, provided the cheese is very cold and firm.
- Stale Bread: Grinding stale bread creates fresh breadcrumbs with a superior texture compared to a food processor.
- Vegetables: Preparing vegetables for relishes, salsas, or baby food is efficient, especially when using the coarse plate. For example, processing crab meat for specific recipes, as detailed in our crab meat analysis quality review, can benefit from a quick, coarse grind.
Safety Protocols and Best Practices
Operating any food processing equipment requires adherence to strict safety standards, especially concerning foodborne illness prevention.
- Maintain the Cold Chain: Never allow meat to remain in the temperature danger zone (40°F to 140°F or 4°C to 60°C) for more than two hours total (including preparation and grinding time). If grinding in a warm kitchen, reduce this time significantly.
- Hygiene: Wash hands, surfaces, and all equipment thoroughly before and after handling raw meat. Cross-contamination is a major risk.
- Immediate Cooking or Storage: Ground meat spoils faster than whole cuts. Cook the ground meat immediately after processing or store it in the refrigerator (for use within 1-2 days) or freezer (for longer storage).
Official Company Contact
For warranty claims, technical support, or replacement parts for your KitchenAid Meat Grinder Attachment, contact the manufacturer directly.
| Contact Method | Detail |
|---|---|
| Website | |
| Phone Support | 1-800-541-6390 (US/Canada) |
| Product Registration | Recommended for warranty tracking |
Frequently Asked Questions (FAQ)
Can I grind bones with the KitchenAid meat grinder attachment?
No. The KitchenAid attachment is designed for soft tissues, such as meat, fat, and soft cartilage. Attempting to grind bones, even small poultry bones, will likely damage the plastic or metal housing, the auger, and potentially strip the gears in your stand mixer motor. Dedicated commercial or industrial grinders are required for bone processing.
Why is my meat coming out mushy or smeared?
Mushy or smeared meat is almost always a result of insufficient chilling. If the meat is too warm (above 35°F), the fat melts, and the muscle fibers are crushed rather than cleanly cut. Ensure both the meat and the entire grinder attachment are thoroughly chilled before use.
How do I prevent rust on the metal grinding plates and blade?
Rust prevention relies entirely on immediate and thorough drying. After washing the metal components, dry them completely with a towel. For long-term storage, apply a very light coat of food-grade mineral oil to the blade and plates before storing them in an airtight container.
Can I use the grinder attachment to make nut butter?
While the grinder can process nuts, it is generally not the ideal tool for smooth nut butter. The high oil content in nuts can cause clogging and smearing, requiring frequent cleaning. A high-powered food processor or a dedicated nut butter machine is usually more effective.
What speed should I use if the meat starts jamming?
If the meat jams, immediately turn the mixer off. Do not increase the speed, as this can damage the motor. Disassemble the attachment, clear the blockage (usually a piece of sinew or unchilled fat), re-chill the meat, and resume grinding at Speed 4.
Elevate Your Culinary Craftsmanship Today
The KitchenAid meat grinder attachment is a powerful tool that unlocks superior control over your ingredients, whether you are preparing custom burger blends, making fresh sausage, or processing vegetables. By adhering to proper chilling techniques and maintenance protocols, you ensure that your attachment delivers professional-grade results for years to come. Take control of your kitchen and explore the full potential of your stand mixer by integrating this essential accessory into your routine. Visit the official KitchenAid website to explore the latest models and accessories.
References
- KitchenAid. KitchenAid Stand Mixer Attachments and Accessories Guide. 2025. – This official guide provides up-to-date specifications and compatibility charts for all current KitchenAid grinder models, including the KSMMGA.
- U.S. Department of Agriculture (USDA). Home Food Safety: Grinding Meat at Home. 2025. – The USDA outlines critical temperature controls and hygiene practices necessary to prevent foodborne illness when processing raw meat domestically.
- National Sanitation Foundation (NSF). Guidelines for Food Processing Equipment Cleaning and Maintenance. 2025. – Provides industry standards for the cleaning and sanitation of food contact surfaces, emphasizing the importance of immediate disassembly and thorough drying of metal components.
Last Updated on October 14, 2025 by Robert Vance