The Essential Guide to Assembling Your Meat Grinder Safely and Correctly
Proper assembly is the critical first step in achieving a safe, efficient, and high-quality grind. Whether you are setting up a robust commercial-grade electric unit, a manual hand-crank model, or a popular stand mixer attachment, understanding the function and correct orientation of each component is paramount. A correctly assembled meat grinder minimizes wear on the motor and parts, prevents jamming, and, most importantly, ensures food safety.
This comprehensive guide provides detailed, step-by-step instructions for how to https://meatgrinderhelp.com/ components, focusing on the universal principles that apply across most modern designs, including popular models like KitchenAid and LEM.
Pre-Assembly Checklist: Safety and Sanitation
Before you begin the physical process of putting together your meat grinder, preparation is key. This stage addresses crucial aspects of food safety and operational longevity.
Required Tools and Components
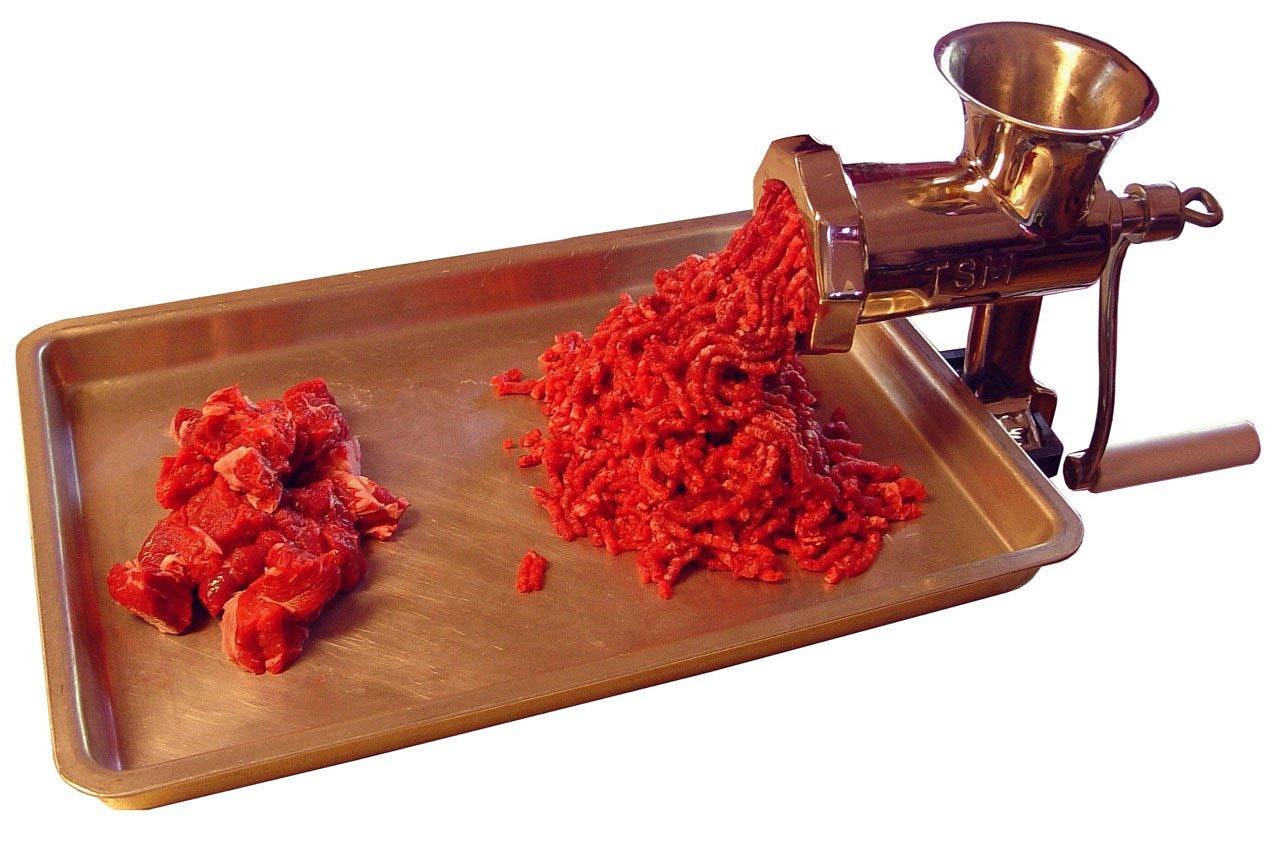
Ensure all parts are present and accounted for. While specific names may vary by manufacturer, the core components of a standard meat grinder are:
- Grinder Housing/Head: The main body where the grinding takes place. It attaches to the motor base or countertop.
- Auger (Worm Gear): The spiral screw that pushes the meat toward the cutting elements.
- Grinding Knife (Blade): A four-pronged or cross-shaped blade that rotates against the plate.
- Grinding Plate (Disc): A perforated disc that determines the coarseness of the grind.
- Locking Ring (Cap): The large, threaded ring that secures the knife and plate onto the housing.
- Hopper/Tray: The shallow pan that sits atop the housing to hold the meat before feeding.
- Pusher/Stomper: Used to safely feed meat into the auger.
Initial Cleaning and Sanitization
Even if the grinder is brand new, it must be thoroughly cleaned before its first use. Manufacturing residues, oils, and dust can contaminate your meat.
- Disassemble Completely: If the unit is new, take all components apart.
- Wash: Wash all metal parts (housing, auger, knife, plates, locking ring) immediately in hot, soapy water. Use a non-abrasive brush to clean crevices.
- Rinse: Rinse thoroughly under hot running water.
- Sanitize (Optional but Recommended): For maximum safety, especially with raw meat processing, use a mild sanitizing solution (e.g., a diluted bleach solution or commercial food-grade sanitizer) and follow the manufacturer’s instructions for contact time.
- Chill: This is a professional technique that drastically improves grinding performance. Place the clean, dry metal components (auger, knife, plate, and housing) in the freezer for at least 30 minutes before assembly. Cold metal prevents the meat from warming up too quickly, ensuring a clean cut rather than a smear, which is vital for maintaining meat texture and inhibiting bacterial growth.
Step-by-Step Assembly for Standard Electric and Manual Grinders
This sequence applies to most standalone electric grinders (like LEM or Cabela’s) and traditional manual clamp-style grinders.
Step 1: Securing the Grinder Head (Housing)
First, ensure the grinder head is firmly attached to its base or mounting surface.
- Electric Grinders: The housing typically slides onto the motor neck and is secured by a large locking knob or a spring-loaded pin. Ensure the head is fully seated and the locking mechanism is engaged to prevent rotation or detachment during operation.
- Manual Grinders: Clamp the unit securely to a sturdy countertop. The rubber pads should be in contact with the surface to prevent slipping.
Step 2: Inserting the Auger (Worm Gear)
The auger is the driving force that moves the meat. It must be inserted correctly to engage with the motor or the hand crank.
- Orientation: The auger has a thicker end (the drive shaft) and a narrower end (the cutting end).
- Insertion: Slide the thick end of the auger into the grinder head opening. For electric models, the drive shaft must align perfectly with the motor’s drive socket. You may need to rotate the auger slightly until it clicks into place and seats fully.
- Verification: The narrow end of the auger should protrude slightly from the front opening of the grinder head, ready to receive the knife.
Step 3: Positioning the Grinding Knife (Blade)
This is the most critical step for successful grinding. Incorrect knife orientation is the number one cause of poor performance and jamming.
- Identify the Cutting Surface: The knife has two sides: a flat, sharpened side (the cutting surface) and a slightly recessed or rounded side (the back).
- Placement: Slide the knife onto the square pin at the end of the auger shaft.
- Crucial Orientation: The flat, cutting surface MUST face outward, pressing against where the grinding plate will sit. If the knife faces backward, the meat will be mashed, not cut.
Step 4: Selecting and Placing the Grinding Plate (Disc)
The plate determines the final texture of your ground meat. Choose the appropriate plate (coarse, medium, or fine) based on your recipe (e.g., coarse for chili, medium for burgers, fine for hot dogs).
- Alignment: The plate has small notches or a keyway on its outer edge.
- Placement: Slide the plate over the auger pin, ensuring the plate’s notches align with the corresponding lugs or slots inside the grinder head opening. This alignment prevents the plate from spinning when the auger turns.
- Contact: The plate should sit flush against the flat, cutting surface of the knife.
Step 5: Tightening the Locking Ring (Cap)
The locking ring holds the entire assembly—knife and plate—in place and ensures the necessary pressure for a clean cut.
- Thread Carefully: Slide the locking ring over the plate and carefully begin threading it onto the grinder head. Be careful not to cross-thread the ring, which can damage the threads and compromise the seal.
- Tightening: Hand-tighten the ring firmly. It should be snug enough to create solid contact between the knife and the plate, but do not overtighten, as excessive pressure can strain the motor or make disassembly difficult.
Step 6: Attaching the Hopper and Powering Up
- Hopper Placement: Place the meat tray (hopper) securely on top of the grinder head. This provides a safe, clean surface for staging the meat.
- Final Check: Verify that the knife is oriented correctly and the locking ring is tight.
- Power: Plug in the unit (if electric) and prepare your chilled meat for grinding.
Specific Assembly Instructions for Popular Models
While the core principles remain the same, certain popular models have unique attachment mechanisms.
Assembling the KitchenAid Meat Grinder Attachment
The KitchenAid attachment is a popular choice for home cooks, utilizing the stand mixer’s power hub.
- Prepare the Mixer: Turn off and unplug the KitchenAid stand mixer. Flip up the power hub cover on the front of the mixer head.
- Attach the Housing: Insert the attachment’s drive shaft into the power hub. The shaft has a notch that must align with the square drive socket in the hub. Rotate the attachment slightly until it slides fully in.
- Secure: Tighten the thumb screw on the mixer hub to lock the attachment in place. The attachment should be horizontal and stable.
- Internal Components: Proceed with the standard assembly steps (Steps 2 through 5 above): Insert the auger, then the knife (flat side out), then the plate, and finally, secure with the locking ring.
For more detailed guidance on maximizing performance, consult our KitchenAid meat grinder attachment guide 2.
Key Differences in Assembling LEM Grinders
LEM Products are known for their heavy-duty construction and often feature larger components and specialized locking mechanisms, particularly on their Big Bite series.
- Head Lock: LEM grinders often use a large, robust hand knob or lever to secure the grinder head to the motor base, providing superior stability compared to smaller units.
- Plate/Knife Size: Due to the larger size of the components, ensure the knife and plate are perfectly centered on the auger pin before applying the locking ring. Misalignment is more common with larger, heavier parts.
- Lubrication: Some LEM models recommend a light application of food-grade mineral oil on the threads of the locking ring to ensure smooth operation and prevent seizing, especially after repeated use and cleaning.
If you are considering a new unit, review our comprehensive LEM meat grinder buying guide for model-specific details.
Troubleshooting Common Assembly Errors
Even experienced users occasionally encounter issues during assembly. Addressing these common problems ensures a smooth first grind.
The Knife is Not Cutting: Blade Orientation
Symptom: The meat is being mashed, squeezed, or smeared out of the plate, rather than cleanly cut. The grinder is struggling.
Solution: Immediately stop the machine. Disassemble the front end. The knife is almost certainly installed backward. The flat, sharpened side must face the plate. Reassemble, ensuring the cutting edge is in direct contact with the plate surface.
The Locking Ring Won’t Tighten: Cross-Threading Prevention
Symptom: The locking ring feels stiff, grinds, or stops abruptly when attempting to tighten it onto the grinder head.
Solution: This is usually caused by cross-threading. Unscrew the ring completely. Inspect the threads on both the ring and the head for damage. Start the threading process again, ensuring the ring is perfectly perpendicular to the head before turning. If necessary, apply a small amount of food-grade lubricant to the threads.
Grinder Head Wobbles: Securing the Neck
Symptom: The entire grinder head moves or vibrates excessively when the motor is running, especially under load.
Solution: The head is not fully seated or the locking mechanism is loose. Turn off the unit. Check the connection point between the head and the motor base. For electric models, ensure the locking knob is fully tightened or the spring pin is engaged. For manual models, tighten the clamp securely to the counter.
Post-Assembly Verification and First Grind Preparation
Once assembled, a final verification step ensures operational readiness and safety.
- Hand Test (Manual): Turn the hand crank slowly. The auger should turn smoothly, and the knife should rotate against the plate without excessive friction or binding.
- Motor Test (Electric): Run the motor briefly (10-15 seconds) without meat. Listen for unusual noises, grinding, or excessive vibration. If the machine sounds strained, immediately turn it off and check the tightness of the locking ring and the seating of the auger.
- Meat Temperature: Ensure your meat is cut into strips or cubes small enough to fit into the throat of the grinder and is partially frozen (around 32°F / 0°C). This firmness is essential for the knife to cut cleanly.
- Lubrication Grind: For the very first use, or after a long period of storage, some experts recommend running a small amount of fat or bread through the grinder first. This helps lubricate the components and ensures any residual cleaning water is expelled before processing your main batch of meat.
For ongoing maintenance and optimal performance, refer to our section on Care & Maintenance.
Frequently Asked Questions (FAQ)
Q: Why is my meat grinder knife not cutting the meat?
A: The most common reason is incorrect knife orientation. The flat, sharp side of the knife must face outward, pressing directly against the grinding plate. If it faces backward, the meat is mashed instead of sliced. Another possibility is that the locking ring is too loose, failing to create the necessary pressure between the knife and plate.
Q: Do I need to lubricate the meat grinder parts before assembly?
A: Generally, no. The fat content in the meat itself acts as a natural lubricant during grinding. However, applying a thin layer of food-grade mineral oil to the threads of the locking ring can prevent seizing or corrosion, especially in humid environments. Never use cooking oils, as they can turn rancid.
Q: How tight should the locking ring be?
A: The locking ring should be hand-tightened firmly. The goal is to ensure the knife and plate are in solid contact to facilitate a clean shear cut. If it is too loose, the meat will smear. If it is excessively tight, it can strain the motor, cause unnecessary friction, and make disassembly difficult. A good rule of thumb is to tighten it until resistance is felt, and then give it a final quarter-turn.
Q: Can I assemble the grinder with the plate but without the knife?
A: No. The knife is essential for cutting the meat. Without the knife, the auger would simply push the meat against the plate, resulting in a mashed, extruded texture rather than a clean grind. The knife and plate work together as a shearing mechanism.
Q: What is the difference between the auger and the worm gear?
A: They are the same component. The auger is the spiral screw that conveys the meat, and it is often referred to as the worm gear because of its shape and function in mechanical systems. Its primary role is to move the product forward under pressure.
Q: How do I store my meat grinder after use and cleaning?
A: After thorough cleaning and drying, it is best practice to lightly coat all metal components (knife, plates, auger) with food-grade mineral oil to prevent rust and corrosion. Store the parts disassembled in a dry, airtight container. This ensures the parts are ready for the next use and prolongs the life of the equipment.
Optimize Your Grinding Process
Mastering the assembly of your meat grinder is the foundation for producing superior ground meat. To further refine your technique and explore advanced applications, such as sausage making or specialized grinds, continue to explore the resources available on this site.
Investing time in proper setup, sanitation, and component orientation directly translates into better flavor, texture, and safety for your final product. Take the next step in becoming a grinding expert by exploring advanced Grinding Techniques and maximizing the potential of your equipment.
References
- National Sanitation Foundation (NSF). Guidelines for Food Equipment Design and Construction. 2025. — This document outlines the material and design standards necessary for meat processing equipment to ensure ease of cleaning and sanitation, which is crucial for safe assembly and use.
- USDA Food Safety and Inspection Service. Meat and Poultry Hazards and Controls Guide. 2025. — The USDA provides detailed instructions on maintaining meat temperature during processing to inhibit bacterial growth, reinforcing the necessity of chilling grinder components prior to assembly.
- Meat Processing Technology Institute. The Science of Shear: Optimizing Blade-Plate Contact in Grinding. 2025. — This academic paper details the mechanical relationship between the grinding knife and plate, explaining why precise assembly and correct orientation are vital for achieving a clean, low-temperature cut.
Last Updated on October 14, 2025 by Robert Vance